Customers with an XGS account can log in to our customer portal at my.xgsi.com to set up custom reports. All reports will come from xgsinfo@xgsi.com with your report attached as an. XLSX file. To ensure prompt delivery of the report(s), add xgsinfo@xgsi.com to your address book and have your IT department whitelist the email address.
Setting Up Your Customer Reports
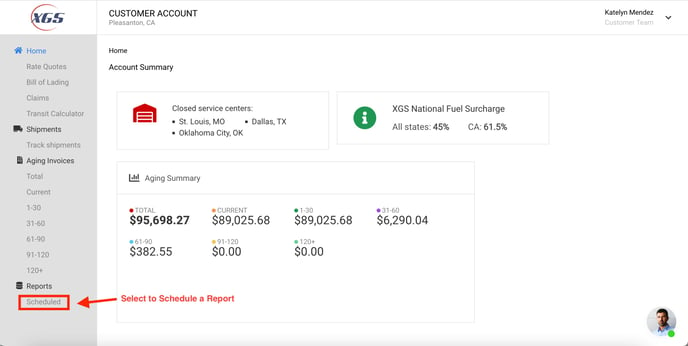
Login into the portal with your username and password. From the home screen, navigate to the left-hand menu and select ‘Scheduled’ under the ‘Reports’ options.
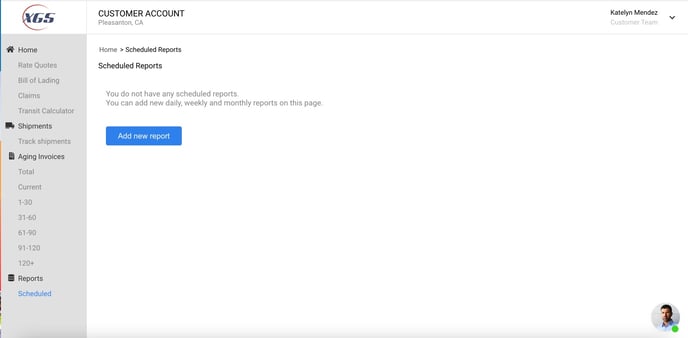
 Once you click on the ‘Schedule’ it will bring you to the custom reports page. Any existing reports will show on this page, and you have to option to create new reports.
 Under ‘Report name,’ Enter the title for your report. This will be used to name the file so make sure it is something easily identifiable and descriptive of the report you are creating. Under "Schedule', you will see a ‘Send Report’ tab. Click on the dropdown menu under it and pick whether you’d like the report to be sent daily, weekly, or monthly. It will automatically be scheduled for daily if you do not pick a time. If you choose to have your report sent weekly, a new box will appear named, ‘Day of the week,’ click on the dropdown menu and choose what day you want your report to send. You will have the option to send it any day of the week. If you choose monthly, it will automatically pick a time to send.
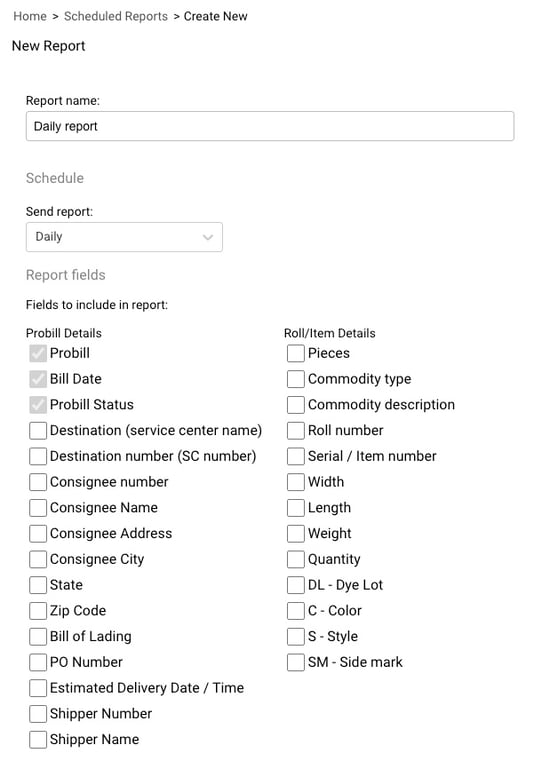
Next, you will be able to choose what fields you’d like to be reported on. The two sections include Probill shipment information and inventory details. The Probill with the date and status will always be included in the report and you can’t uncheck these boxes. You will have the option to include other details like destination info, consignee info, shipping info, etc. All item details are optional, and these can include how quantity, weight, length, type, style, etc.
Next, you will be required to add a recipient of the report. Custom reports can be sent to a maximum of three email addresses.
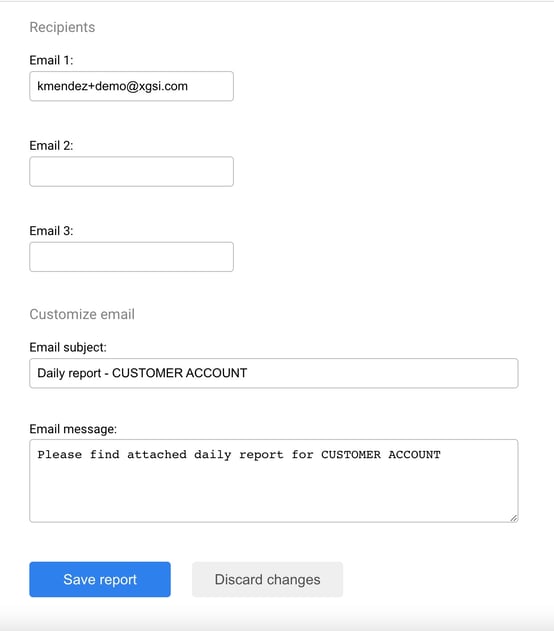
You have the option to customize the subject line and body of the report email. Click the box under ‘Email Subject’ to enter the subject line for the email. To customize the email body under ‘Email message’ or leave it blank if to include a message. Once done, click ‘Save report,’ to schedule your report to go out. When you save your report, you will be taken back to the schedule report main page. Your most recent report will show up at the very top.
If you need a copy of your report immediately select the requested report. On the left-hand side, you’ll see a blue envelop icon with the words, ‘send now’ next to it. If you no longer want to be sent specific reports, click on the report you wish to delete. Scroll down to the bottom of the page and click the ‘delete report’ button.